|
|
|
STAR-CCM+ Lite
|
|||||||||
|
STAR-CCM+ Lite
|
|||||||||
|
◦
|
CD-adapco Office Add-ins (Microsoft PowerPoint integrations) prior to STAR-CCM+ v10.06 must be removed.
|
|
1.
|
|
2.
|
|
1.
|
|
b.
|
While holding down the <Shift> key, right-click on a blank area in the directory and select Open command window here.
|
|
2.
|

|
3.
|
|
|
STAR-CCM+ module
|
|
|
11.06.###/STAR-CAD11.06.### contains the constituent applications of the CAD Clients (Windows only).
|
|
|
|
|
|
|
11.06.###/FLEXlm (Windows) or FLEXlm_11.13 (Linux) contains the FLEXlm 11.13 Utilities. This directory contains platform specific licensing tools, including lmadmin,lmutil, lmgrd, and cdlmd. The Licensing Administration Guide is also included as a PDF file.
|
|
|
11.06.###/JDK
|
|
1.
|
|
|
Express Install - installs STAR-CCM+ on a single machine with the most common options. Select this option if you have a license file or if you want to set up Power-on-Demand licensing.
|
|
|
Custom Install - installs STAR-CCM+ with advanced options.
|
|
1.
|
Select Setup Language: if you have a Chinese or Japanese operating system, choose your required language and click OK.
|
|
2.
|
|
3.
|
|
4.
|
Choose License Type: this screen presents two licensing options:
|
|
?
|
POD: configures the machine to use CD-adapco’s Power-on-Demand license server.
|
|
?
|
Local: installs and configures a local license server on the current machine.
|
|
5.
|
Select Install Location: click Next to accept the default location, otherwise enter a custom directory location. Note that when creating a new folder in Linux, you must include the whole path. You may also need to press <Enter> to create the folder.
|
|
6.
|
Setup Licensing: this screen appears if no existing licensing information is found on the current machine. If you require a license file, you must get this from CD-adapco after obtaining the necessary hostid. Browse to the license file and when complete, click Next.
|
|
7.
|
Pre-Installation Summary: this screen shows a summary of what will be installed on your machine. Click Next to proceed with the installation.
|
|
8.
|
Installing: this screen shows the current progress of the installation process.
|
|
9.
|
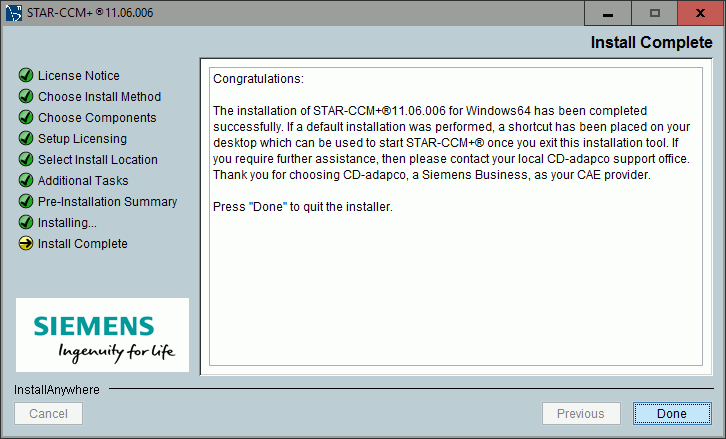
Install Complete: this final screen indicates the end of the STAR-CCM+ installation process. If any errors were encountered during installation, a message is displayed here prompting you to check the installation log file.
 |
|
1.
|
Select Setup Language: if you have a Chinese or Japanese operating system, choose your required language and click OK.
|
|
2.
|
|
3.
|
|
4.
|
Choose Install Type: this screen presents the components that are available for installation on your system. Select the desired components and click Next.
|
|
◦
|
STAR-CCM+ and related components > Install STAR-CCM+ on local or shared NFS location: installs STAR-CCM+ on the current machine or in a location of your choice.
|
|
◦
|
FLEXNet License Manager: choosing this option will provide two further options in a subsequent step where you can choose to either use an existing license server on the network, or to install and configure a FlexNet license server on the host machine.
|
|
5.
|
Choose STAR-CCM+ Components: choose the components to install.
|
|
◦
|
STAR-CCM+: installs STAR-CCM+ on your system.
|
|
◦
|
STAR-CCM+ Documentation: installs the STAR-CCM+ documentation on your system.
|
|
◦
|
STAR-View+: installs STAR-View+.
|
|
6.
|
|
?
|
Network: configures the current machine to access a network license server. If you want to connect to the CD-adapco Power-on-Demand license server, or another existing license server in your organization, select this option and follow the step below:
|
|
▪
|
FlexNet Client Configuration: enter the hostname and port number of your organization's license server using the format: port@host. If you are using Power-on-Demand licensing, enter 1999@flex.cd-adapco.com. You can add additional redundant servers if your network is set up to support this. Click Next to continue.
|
|
?
|
Local: installs and configures FlexNet publisher on the current machine. If you choose this option, follow the relevant steps below:
|
|
▪
|
FlexNet License Server Configuration: enter the Web Port Number and License Port Number, otherwise click Next to keep the default values.
|
|
▪
|
Select license file: browse to the license that you obtained from CD-adapco and click Next.
|
|
7.
|
Select Install Location: enter a custom directory for the STAR-CCM+ installation, otherwise click Next to accept the default location.
|
|
8.
|
Select Additional Tasks: select the additional tasks you want the installer to perform:
|
|
◦
|
Add application directories to your system path: activate this option if you generally launch software from a command prompt window, and you only wish to use this latest version of STAR-CCM+. If you want to run STAR-CCM+ by typing the full path, deactivate this option.
|
|
9.
|
Pre-Installation Summary: this screen shows a summary of what will be installed on your machine. Click Next to proceed with the installation.
|
|
10.
|
Installing: this screen shows the current progress of the installation process.
|
|
11.
|
Start a browser: this page appears if you selected the Local license option in the Choose License Type screen. If you select Start browser now, a web browser launches and displays the license details in lmadmin. If this is not required, click Next without changing anything.
|
|
12.
|
Install Complete: this final screen indicates the end of the STAR-CCM+ installation process. If any errors were encountered during installation, a message is displayed here prompting you to check the installation log file.
|
|
|
-i console runs the installer in console mode, which installs STAR-CCM+ with the default settings (as used in the Express install). Output from this installation is shown in the console window. Note that you are required to accept the license agreement and choose the location for the installation in the console.
|
|
|
-i silent performs a silent installation. No console or dialog windows appear. Information on installation process is stored in the log file.
|
|
|
-f "filename" instructs Setup to load the settings from the specified file after having checked the command line. Use quotes if the filename contains spaces.
|
|
|
-r "filename" instructs Setup to save installation settings to the specified file. Use quotes if the filename contains spaces.
|
|
|
-DINSTALLDIR=<path> provides an alternative location for the STAR-CCM+ installation.
|
|
|
-PCMPIINSTALLDIR=<path> provides an alternative location for the IBM Platform MPI installation.
|
|
|
-D<PARAMETER>=true/false provides additional installation options, where <PARAMETER> can be:
|
|
◦
|
INSTALLFLEX controls whether the license server is installed and configured. If you do not want to install the license server, set this argument to false.
|
|
◦
|
ADDSYSTEMPATH adds the application directories to your system path. If you generally launch software from a shell, and you only wish to use this latest version of STAR-CCM+, set this argument to true. Note that by default this value is set to true and your user profile file (.cshrc or.profile files, for example) are modified. If you do not want your profile to be modified, set this argument to false.
|
|
◦
|
NODOC controls whether or not the STAR-CCM+ documentation is installed. If you do not want to install the STAR-CCM+ documentation, set this argument to true.
|
|
2.
|
Right-click the zip file and select Extract All...
|
|
3.
|
|
5.
|
Navigate to the STAR-CCM+_CadClients-11.06.### sub-directory and double-click on STAR-CCM+_CadClients11.06.###_[OS].exe, where [OS] is the name of the operating system.
|
|
|
Express Install - installs STAR-CCM+ on a single machine with the most common options. Select this option if you have a license file or if you want to set up Power-on-Demand licensing.
|
|
|
Custom Install - installs STAR-CCM+ with advanced options.
|
|
1.
|
Select Setup Language: if you have a Chinese or Japanese operating system, choose your required language and click OK.
|
|
2.
|
|
3.
|
|
4.
|
Choose License Type: this screen presents two licensing options:
|
|
a.
|
POD: configures the machine to use CD-adapco’s Power-on-Demand license server.
|
|
b.
|
Local: installs and configures a local license server on the current machine.
|
|
5.
|
Setup Licensing: this screen appears if no existing licensing information is found on the current machine. Browse to the license file and when complete, click Next.
|
|
6.
|
Pre-Installation Summary: this screen shows a summary of what will be installed on your machine. Click Next to proceed with the installation.
|
|
7.
|
Installing: this screen shows the current progress of the installation process.
|
|
8.
|
Install Complete: a final screen appears to indicate the end of the STAR-CCM+ installation process. If any errors were encountered during installation, a message is displayed here prompting you to check the installation log file.
 |
|
9.
|
|
1.
|
Select Setup Language: if you have a Chinese or Japanese operating system, choose your required language and click OK.
|
|
2.
|
|
3.
|
|
4.
|
Choose Install Type: this screen presents the components available for installation on your system. Once the desired components have been selected click Next.
|
|
◦
|
STAR-CCM+ and related components: Two following options are available:
|
|
▪
|
Install STAR-CCM+ on this machine or a network location: installs STAR-CCM+ on the current machine or on a location of your choice.
|
|
▪
|
Configure this machine to use an existing STAR-CCM+ network installation: configures the current machine to use an existing installation of STAR-CCM+ from a shared network directory. This options does not install STAR-CCM+. Use this option for a compute node on a cluster, for example. The installer asks you to locate the STAR-CCM+ and STAR-View+ installation directories. These directories must be shared. For each case, point to the folder that contains the STAR-CCM+ or STAR-View+ executables:
|
|
◦
|
FLEXNet License Manager: choosing this option presents two further options in a subsequent step where you choose to either use an existing license server on the network, or to install and configure a FlexNet license server on the current machine.
|
|
5.
|
Choose STAR-CCM+ Components: choose the components to install.
|
|
◦
|
STAR-CCM+: installs STAR-CCM+ on your system.
|
|
◦
|
STAR-CCM+ Documentation: installs the STAR-CCM+ documentation on your system.
|
|
◦
|
STAR-CAD Clients: installs the CAD Clients for the CAD packages that the installer detects on your system. This option does not install STAR-CCM+.
|
|
◦
|
STAR-View+: installs STAR-View+.
|
|
◦
|
Microsoft VC runtimes: installs the Microsoft Visual C++ runtimes. This option is deactivated if the installer detects that the appropriate Microsoft runtimes are already installed on your machine. Avoid manually reinstalling these runtime libraries.
|
|
6.
|
|
?
|
Network: configures the current machine to access a network license server. If you want to connect to the CD-adapco Power-on-Demand license server, or another existing license server in your organization, select this option:
|
|
▪
|
FlexNet Client Configuration: enter the hostname and port number of your organization's license server using the format: port@host. If you are using Power-on-Demand licensing, enter 1999@flex.cd-adapco.com. You can add additional redundant servers if your network is set up to support this. Click Next to continue.
|
|
?
|
Local: installs and configures FlexNet on the current machine. If you choose this option, follow the relevant steps below:
|
|
▪
|
FlexNet License Server Configuration: enter the Web Port Number and License Port Number, otherwise click Next to keep the default values.
|
|
▪
|
Select license file: browse to the license that you obtained from CD-adapco and click Next.
|
|
▪
|
Service Configuration: configures the License Manager service. A default name, CD-adapco_License_Server, is provided for this service. If this service already exists, enter a new name. Activate the Start license server now option if you want this service to start automatically once the installation completes. Click Next to continue.
|
|
7.
|
Select Install Location: enter a custom directory for the STAR-CCM+ installation, otherwise click Next to accept the default location.
|
|
8.
|
Select Additional Tasks: select the additional tasks you want the installer to perform.
|
|
◦
|
Update Windows firewall to allow STAR-CCM+ to run: adds a rule to the Windows firewall to permit socket communication on the specified ports. By default, the Windows firewall may block this communication.
|
|
◦
|
Share install directory: shares the installation directory so that others can access it. This option is useful for parallel runs.
|
|
◦
|
Create a desktop icon: creates a desktop icon on the current machine.
|
|
◦
|
Create shortcuts for current user only: creates shortcuts to CD-adapco products for the current user only.
|
|
9.
|
Pre-Installation Summary: this screen shows a summary of what will be installed on your machine. Click Next to proceed with the installation.
|
|
10.
|
Installing: this screen shows the current progress of the installation process.
|
|
11.
|
Start a browser: this page appears if you selected the Local license option in the Choose License Type screen. If you select Start browser now, a web browser launches and displays the license details in lmadmin. If this is not required, click Next without changing anything.
|
|
12.
|
Install Complete: this final screen indicates the end of the STAR-CCM+ installation process. If any errors were encountered during installation, a message is displayed here prompting you to check the installation log file.
|
|
13.
|
|
|
-i console runs the installer in console mode, which installs STAR-CCM+ with the default settings (as used in the Express install). Output from this installation is shown in the console window. Note that you are required to accept the license agreement and choose the location for the installation in the console.
|
|
|
-i silent performs a silent installation. No console or dialog windows appear. Information on installation process is stored in the log file.
|
|
|
-f "filename" instructs Setup to load the settings from the specified file after having checked the command line. Use quotes if the filename contains spaces.
|
|
|
-r "filename" instructs Setup to save installation settings to the specified file. Use quotes if the filename contains spaces.
|
|
|
-DINSTALLDIR=<path> provides an alternative location for the STAR-CCM+ installation.
|
|
|
-PCMPIINSTALLDIR=<path> provides an alternative location for the IBM Platform MPI installation.
|
|
|
-DCOMPUTE_NODE=<true> only installs the dependencies that are required to run STAR-CCM+. Does not install the full package. This option is intended for use in cluster installations where the full package is installed on the head node only.
|
|
|
-D<PARAMETER>=true/false provides additional installation options, where <PARAMETER> can be:
|
|
◦
|
INSTALLFLEX controls whether the license server is installed and configured. If you do not want to install the license server, set this argument to false.
|
|
◦
|
CURRENTUSERONLY creates a desktop shortcut for the current user only. If you want to create shortcuts for the current user only, set this argument to true. This applies to CD-adapco products only.
|
|
◦
|
SHARE controls whether to share the installation directory so that others can access it. This is useful for parallel runs. The installation directory is shared by default. If you do not want to share the installation directory, set this argument to false.
|
|
◦
|
FIREWALL controls whether to add an exception to the Windows firewall to allow STAR-CCM+ to run. The Windows firewall may attempt to block socket communication. By default, a rule is added by the installer to permit this communication. If you do not want this to happen, set this argument to false. Note that you must manually add exceptions to third-party firewall software.
|
|
◦
|
DESKTOPICONS controls whether to create desktop icons for the installed components. By default, the installer creates desktop icons. If you do not want the desktop icons, set this argument to false.
|
|
◦
|
NOADMIN allows the installation and execution of STAR-CCM+ without administrator privileges. You must choose an installation location that is not protected by administrator privileges. If you set this argument to true, additional directories are created in the STAR-CCM+ server directory which contain all required Microsoft run-times. Systems administrators can use the NOADMIN mode to install STAR-CCM+ on a central server and run on Windows clients without installing additional components. Note that only sequential or shared memory IBM Platform MPI parallel runs are supported when you perform a NOADMIN installation.
|
|
◦
|
NODOC controls whether or not to install the STAR-CCM+ documentation. If you do not want to install the STAR-CCM+ documentation, set this argument to true.
|
|
|
If no CDLMD_LICENSE_FILE environment variable is defined, enter the following command:
|
|
1.
|
|
2.
|
|
1.
|
Use the command line installer to install STAR-CCM+ on the central server. You must use the -DNOADMIN=true option when running the installer.
|
|
3.
|
On each client workstation, run the STAR-CCM+ PowerShell script, STAR-CCM+.ps1, which is located in the root directory of the shared STAR-CCM+ installation.
|
|
1.
|
|
2.
|
Click on the <Start> button and enter PowerShell in the search field. Select Windows PowerShell from the list that appears.
|
|
3.
|
|
1.
|
|
2.
|
|
|
CATIA -- During installation a STAR-CAT5 R XX Y YY YYY icon is created on the desktop, or in the CATIA folder in the All Programs menu. Double click this icon to start STAR-CAT5. Open a CATPart or CATProduct and start STAR-CAT5 from the Analysis and Simulation menu.
|
|
|
NX -- STAR-NX loads automatically when you launch NX. A STAR-NX menu appears in the NX menu bar.
|
|
|
Creo -- STAR-Creo is an Auxiliary Application extension that launches automatically when starting Creo. The STAR-Creo ribbon appears in the Creo user interface.
|
|
|
Inventor -- STAR-Inventor loads automatically when you launch Inventor. The STAR-Inventor ribbon appears in the Inventor user interface.
|
|
1.
|
|
2.
|
|
3.
|
|
1.
|
|
2.
|
|
3.
|
|
3.
|
If this machine is not the one used during the previous installation steps, or if the FLEXlm 11.13 Utilities were not selected during installation, you must re-run the STAR-CCM+ installer on this machine and choose to install the FLEXlm 11.13 Utilities.
|
|
5.
|
|
6.
|
|
7.
|
|
1.
|
|
2.
|
|
1.
|
|
2.
|
|
3.
|
|
4.
|
|
1.
|
|
2.
|
|
3.
|
|
1.
|
Launch a web browser and enter http://localhost:[PORT]/ in the address bar, where [PORT] is the web port number you specified during installation.
|
|
2.
|
|
3.
|
|
4.
|
|
5.
|
|
6.
|
|
7.
|
|
1.
|
Launch a web browser and enter http://localhost:[PORT]/ in the address bar, where [PORT] is the web port number you specified during installation. The default port is 8080.
|
|
2.
|
|
3.
|
|
4.
|
|
5.
|
|
6.
|
|
7.
|
|
8.
|
|
1.
|
|
2.
|
|
1.
|
|
◦
|
<port> is the port number through which communication takes place.
|
|
◦
|
<server> is the name or TCP/IP address of the machine on which the license server is running.
|
|
1.
|
|
2.
|
|
3.
|
|
4.
|
|
5.
|
|
6.
|
|
◦
|
<port> is the port number through which communication takes place.
|
|
◦
|
<server> is the name or TCP/IP address of the machine on which the license server is running.
|
|
7.
|
|
8.
|
|
9.
|
|
1.
|
Launch a web browser and enter http://localhost:[PORT]/ in the address bar, where [PORT] is the web port number you specified during installation.
|
|
2.
|
|
2.
|
Kill the processes using kill -9.
|
|
3.
|
|
|
|
|
In parallel, the master process requires a ccmpsuite to launch and run. Additional processes created by the controller require an hpcdomains, a ccmpsuite, or a DOEtoken license to start and continue solving. As an example, a two-worker parallel job on a dual CPU machine would require one ccmpsuite license and one hpcdomains license.
|
|
|
If the Power Session license option is chosen, the ccmppower license is used regardless of whether the session is serial or parallel, and without any limit to the number of worker processes that can be launched.
|
|
|
If the Lite Session license option is chosen, the ccmplite license is used if it is available; otherwise the ccmpsuite license is used.
|
|
|
For battery modeling, STAR-CCM+ requires a batterysim license in addition to the other license features. Battery Design Studio®, which is supplied for use with the STAR-CCM+ battery modeling capability, requires either a batterysim or a batterydesignstudio license.
|
|
|
|
|
For importing geometry into STAR-CCM+, you require a JTOpen license for .jt geometries, or a cadexchange license for all other supported CAD formats.
|
|
|
STARLICENSELOG When the license routines run, they will write to the file that this is pointing to as well as to standard out. This can be useful if license messages do not appear. This has to be set to the file.
|
|
|
STARLICENSEVERBOSE Causes more verbose messages to be displayed to both the screen and log file.
|
|
|
STARNOFLEXLMRC FlexNet will not write to the ~/.flexlmrc file (Linux) or the HKEY_LOCAL_MACHINE\SOFTWARE\FLEXlm License Manager registry key (Windows).
|
|
|
STARNOTIMEOUT FlexNet normally times out after two hours of inactivity. This means that if a machine crashes with a license checked out, the license will return to the server after this time. In cases where no activity for two hours is normal (a queuing system that suspends a job during the day) then this will release the license and the job may fail to get the license when it progresses (another user may have the license). If this variable is set, FlexNet will never time-out and so will avoid this. However, be aware that this may cause licenses, which would otherwise be returned, to remain checked out. Use lmremove to deal with checked out licenses that have not been returned as expected.
|
|
|
STARWAIT Normally, FlexNet will return if a license is unavailable and the code will exit. If STARWAIT is set, then FlexNet will wait until a license becomes available. This may be of use in queue or batch systems.
|
|
|
The License File (license.dat)
|
|
|
The License Server Manager (lmadmin)
|
|
|
The CD-adapco daemon (cdlmd)
|
|
|
Report Log File, created and written by cdlmd for use by FlexNet Manager
|
|
2.
|
The application establishes a connection with the license server manager (lmadmin) and tells it that it needs to talk to cdlmd.
|
|
3.
|
lmadmin determines which machine and the TCP/IP port correspond to cdlmd and sends that information back to the CD-adapco application.
|
|
4.
|
The CD-adapco application establishes a connection with cdlmd and sends its request for a license.
|
|
5.
|
cdlmd checks in its memory to see if any licenses are available and sends a grant or denial back to the application.
|
|
1.
|
When one machine is down, the pool of licenses is reduced. So if each machine has 10 copies of ccmpsuite, when London is down, there are only 20 copies of ccmpsuite to share between three sites instead of 30.
|
|
|
1999@offal with 2 hpcdomains
|
|
|
|
|
20 licenses for ccmpsuite
|
|
|
|
|
host is the system host name or IP address. On Linux, this is the name returned by the hostname or uname -n command. On Windows, ipconfig /all.
|
|
|
hostid is usually the string returned by the lmhostid command. This is set by CD-adapco.
|
|
|
port is the TCP/IP port number to use. A valid number is any unused port number between 0 and 64000. On Linux, choose a port number greater than 1024, since those less than 1024 are privileged port numbers. If no TCP/IP port number is specified, one of the default ports in the range of 27000 and 27009 is used. Flexera recommends using port numbers outside the range of 27000 through 27009.
|
|
|
vendor Name of the vendor daemon used to serve some feature(s) in the file. This name cannot be changed by the administrator.
|
|
|
vendor_daemon_path is an optional path to the executable for this daemon. Generally the license administrator is free to install the daemon in any directory. (It is recommended, however, that it be installed in a local directory on the license server machine.) If omitted, lmadmin looks for the vendor daemon binary in:
|
|
◦
|
The path specified in lmadmin’s $PATH environment variable
|
|
◦
|
in the directory where lmadmin is located
|
|
|
If vendor_daemon_path is blank, then any options or TCP/IP port number specifications require the OPTIONS= and PORT= strings.
|
|
|
options_file_path is the full path to the end-user options file for this daemon. FLEXnet does not require an options file. If omitted, the CD-adapco daemon looks for a file called cdlmd.opt that is located in the same directory as the license file.
|
|
|
port is the vendor daemon TCP/IP port number. The default, if the port number is not specified, it is chosen by the operating system at run-time. Sites with Internet firewalls need to specify the TCP/IP port number the daemon uses. If a TCP/IP port number is specified on the VENDOR line, there may be a delay when restarting the vendor daemon.
|
|
|
feature Name given to the feature by the vendor.
|
|
|
vendor Name of the vendor daemon; also found in the VENDOR line. The specified daemon serves this feature.
|
|
|
feat_version Version of this feature that is supported by this license.
|
|
|
exp_date Expiration date of license in the format dd-mmm-yyyy, e.g., 07-may-2005. If exp_date is the string permanent or the year is 0 (or 00, 000, 0000) then the license never expires.
|
|
|
num_lic is the number of concurrent licenses for this feature.
|
|
|
vendor_info= is additional information provided by CD-adapco.
|
|
◦
|
use_server format
|
|
|
The value of an environment variable (LM_LICENSE_FILE or CDLMD_LICENSE_FILE) that can be specified in two ways:
|
|
◦
|
The content of a file (Linux) or registry key (Windows) in the VARIABLE=value format
|
|
◦
|
Using the setenv command at the command line or in your shell startup script
|
|
◦
|
Defining the variable in a ~/.flexlmrc file that contains a single line in the CDLMD_LICENSE_FILE=value format
|
|
◦
|
Using the set command at the command line
|
|
◦
|
Setting a variable using Start > Settings > Control Panel > System > Advanced > Environment Variables dialog
|
|
◦
|
Defining a key in the HKEY_LOCAL_MACHINE\SOFTWARE\FLEXlm License Manager registry branch, where the variable will be the name of the key and the value will be stored in the value of the key
|
|
|
A directory containing one or more license files with a.lic extension
|
|
|
The CDLMD_LICENSE_FILE environment variable
|
|
|
|
|
The LM_LICENSE_FILE environment variable
|
|
|
|
|
The STAR_DIR environment variable
|
|
1.
|
|
2.
|
|
1.
|
|
2.
|
Select regedit.exe from the search results.
|
|
3.
|
Navigate to HKEY_LOCAL_MACHINE > SOFTWARE > Wow6432Node > FNPlm > License Server > [Your_CD-adapco_Lic_Server].
|
|
4.
|
|
5.
|
|
6.
|
|
7.
|
Click OK.
|
|
1.
|
Open the hosts file in a text editor of your choice.
|
|
2.
|
|
|
|
|
On Linux: ~/.star-X.XX.XXX/var/log/messages.log, where ~ is your home directory and X.XX.XXX is the version of STAR-CCM+ , for example 7.04.006
|
|
|
On Windows: C:\Users\username\AppData\Local\CD-adapco\STAR-CCM+ X.XX.XXX\var\log\
|
|
|
Your home directory on Linux
|
|
|
C:\Users\user\Documents\ on Windows
|
|
|
|
|
Alternatively on Windows, right-click the Desktop icon in the object tree of Windows Explorer and select Properties. In the separate dialog that appears, click Display Settings in the list of options under the Personalize appearance and sounds heading. In the separate Display Settings dialog, click the Advanced Settings... button. This activates another dialog with tabs that provide detailed information on the graphics hardware and drivers.
 |
|
|
Path: a path is the name generally used to identify the location of a directory or file in a file system. Some examples of paths are as follows:
|
|
|
System path: the system path is a collection of paths that point to those directories (or folders) that contain program executables.
|
|
|
Executable: a file that contains program instructions, as opposed to a file that contains only data. Entering the path to an executable file into a command prompt window, and pressing <Return>, will cause the computer to run the program instructions contained within the file.
|